XAMPP is an abbreviation for cross-platform, Apache, MySQL, PHP and Perl, and it allows you to build WordPress site offline, on a local web server on your computer. This simple and lightweight solution works on Windows, Linux, and Mac – hence the “cross-platform” part.
XAMPP provides two essential components for its installation – Apache, which is used to create the local server, and MySQL which you can use as a database for your website.
It allows us to create a local copy of the site in which we can try out new plugin updates before implementing them on its live version.
How to install XAMPP?
Step One:
The first step in setting up XAMPP: go to the Apache Friends website and download the file for the platform you are using. You will see separate download links for Windows, Linux and OS X. Note that there is no 64-bit version for Windows, but the 32-bit one works perfectly fine.
Find tge setup from the following link:
The file size is not that large (around 110MB).
After downloading it, launch the installer and XAMPP setup will begin.
Step Two: Initial Installation Steps
Sometimes, depending on your operating system, you may receive a security warning. Don’t worry, XAMPP is safe to install. When setup wizard pops up, click “Next”, and in the next window, you will be asked to select components you want to install.
Next, select the folder where you would like to install XAMPP on your computer. It’s up to you if you want to create a new folder or use the default path (C:\Program Files\XAMPP).
Step Three: XAMPP Setup
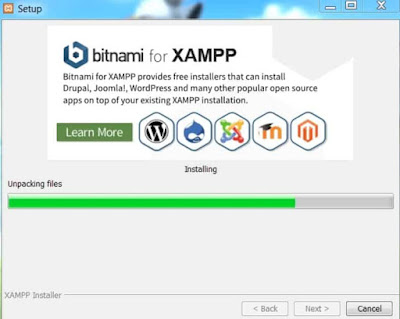
Clicking on the next your installation process will be started. The setup wizard will unpack and install all the selected components and will save them to their designated directory. The installation process takes a couple of minutes to complete.
Step Four: Running XAMPP
In the control panel, you will be able to control individual components of your text server. Here you can start or stop individual modules by clicking the buttons below “Actions”. The control panel contains various buttons like config, net stat, shell, explorer, services, help, quit.
Config → It allows you to configure the XAMPP as well as the individual components
Netstat → Helps you to show all the current running process on the local system
Shell → It allows opening UNIX shell
Explorer → It will open the XAMPP folder in windows explorer
Services → Help to show all the services that are currently running in the back-end
Help → As the name implies it gives you links to the user forums
Quit → By clicking the button the XAMPP control panel will exit
Step Five: Getting Started
In the XAMPP control panel, click the necessary modules that are required for you to work. You can start the modules by clicking the “Start” button under “Actions”. You will be able to see the initiated modules highlighted in green. For example, if you are using WordPress platform then the required components are Apache and MYSQL.
Note: If you cannot start a module as a result of the error, then it will be indicated with a red font. They will provide you with a detailed report to identify the cause of an error.
Then by clicking the Apache or any “Admin” button in the XAMPP control panel, you will be able to configure each module settings separately.
That’s it, now in your web browser type localhost and you will be able to see a splash screen of XAMPP. Here you have to choose a language which you understand.
Now you have successfully installed XAMPP on your windows.
Hope you get an idea of what is XAMPP & install XAMPP on your localhost.
Thank you for visiting my blog.


Thank you brother!! Now I can install it in my computer without any quires..!
ReplyDelete